
Installation
Install Gridline from WordPress.org and make your first edits in the Bulk Editor in a few minutes.
Gridline is free and listed on WordPress.org, so you can install it straight from your dashboard.
Install the plugin
- Make sure WooCommerce is installed and active. Gridline won't activate without it.
- Go to Plugins → Add New Plugin and search for Gridline.
- Click Install Now on "Gridline – Bulk Product Editor for WooCommerce", then Activate.
If you have the zip file instead, use Plugins → Add New Plugin → Upload Plugin, choose the file, then Install Now and Activate.
Nothing changes on your store: Gridline adds a screen for editing products and doesn't touch your shop's front end.
Open the Bulk Editor
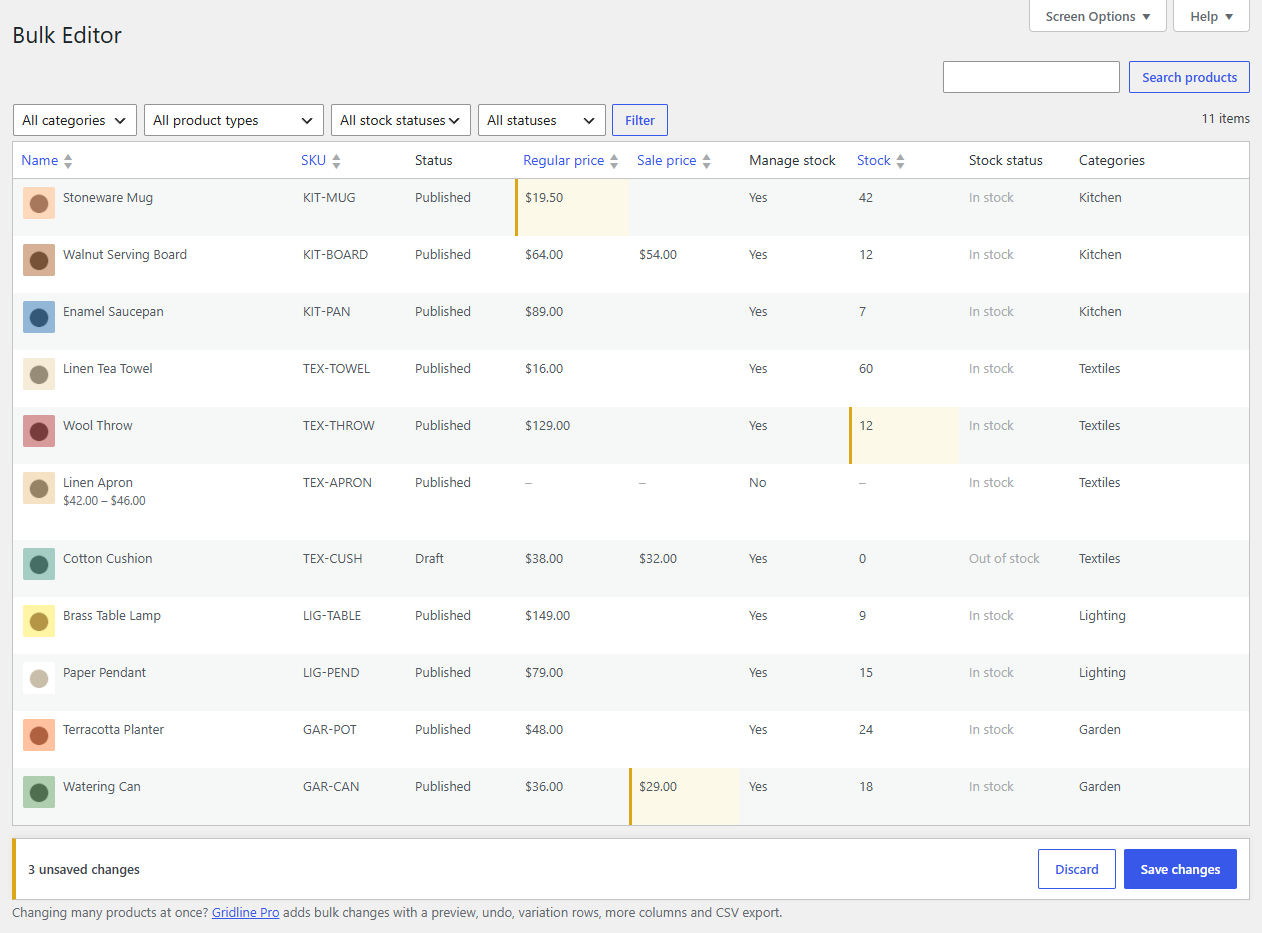
Go to Products → Bulk Editor. You'll also find a Bulk Editor button next to Add new product at the top of the Products screen, and a Bulk Editor link under Gridline on the Plugins screen.
Your products are listed newest first, 50 to a page, one row per product.
Make your first change
- Click a product's Regular price cell.
- Type the new price and press Enter. The cell turns yellow: it's changed, but not saved yet. Enter also moves you down to the same cell of the next product, so you can carry on down the column.
- Press Esc to stop editing.
- Click Save changes in the bar at the bottom of the grid.
A green notice confirms how many changes were saved. Open the product in another tab and you'll see the new price there too: Gridline saves through WooCommerce, exactly as the product screen does.
Tip
Nothing is saved until you click Save changes, so you can edit freely and check your work first. Discard throws away everything you haven't saved.
What's next
- Editing cells covers the keyboard and every kind of field.
- Saving changes explains what happens when a change can't be saved.
- Columns and Screen Options shows how to pick the columns you need.