
Installation
Install Swatchline from WordPress.org and turn your first attribute's dropdown into swatches.
Swatchline is free and listed on WordPress.org, so you can install it straight from your dashboard.
Install the plugin
- Make sure WooCommerce is installed and active. Swatchline won't activate without it.
- Go to Plugins → Add New Plugin and search for Swatchline.
- Click Install Now on "Swatchline – Variation Swatches for WooCommerce", then Activate.
If you have the zip file instead, use Plugins → Add New Plugin → Upload Plugin, choose the file, then Install Now and Activate.
Nothing changes in your shop yet: every attribute starts as a WooCommerce dropdown until you give it a swatch type.
Your first swatches
-
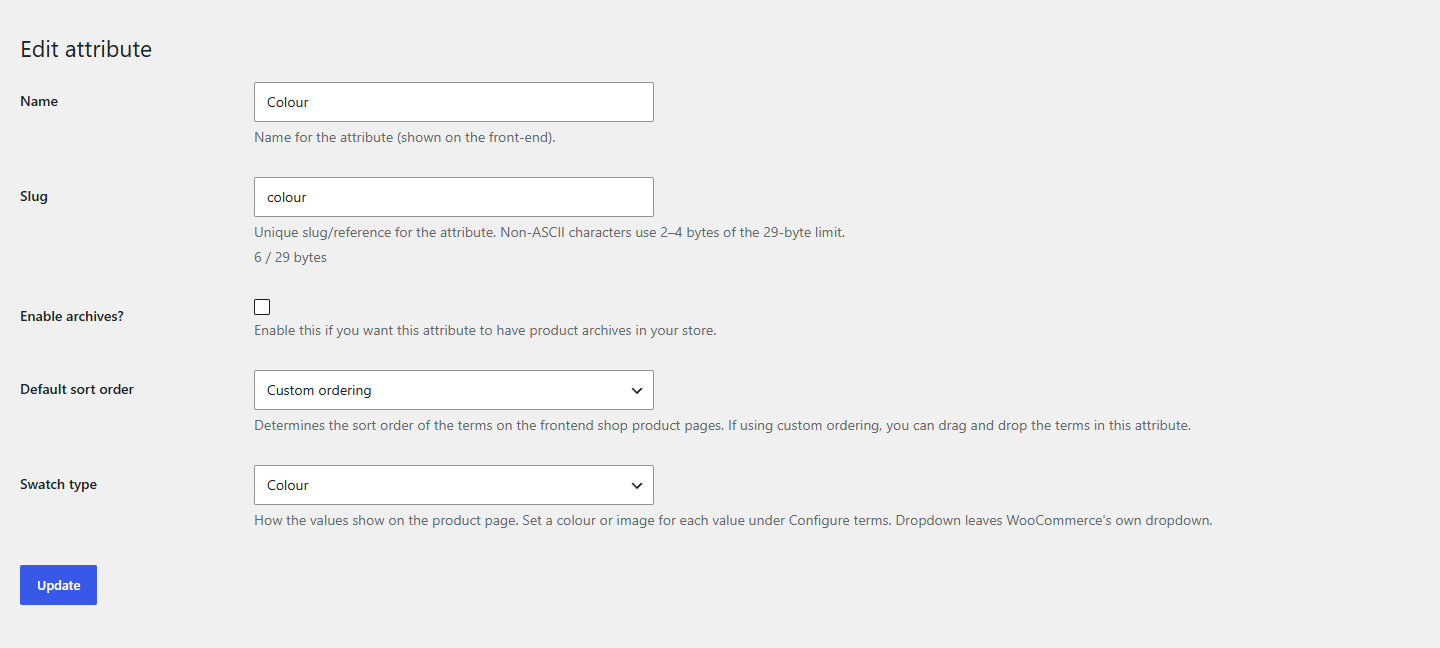
Go to Products → Attributes and click Edit under an attribute, say Colour. (No global attributes yet? Add one in the form on the left of the same screen.)
-
Set Swatch type to Colour and click Update.
-
Back on the list, click Configure terms under Colour, click a value (say Sage), pick its Swatch colour and click Update. Do the same for the other values.
-
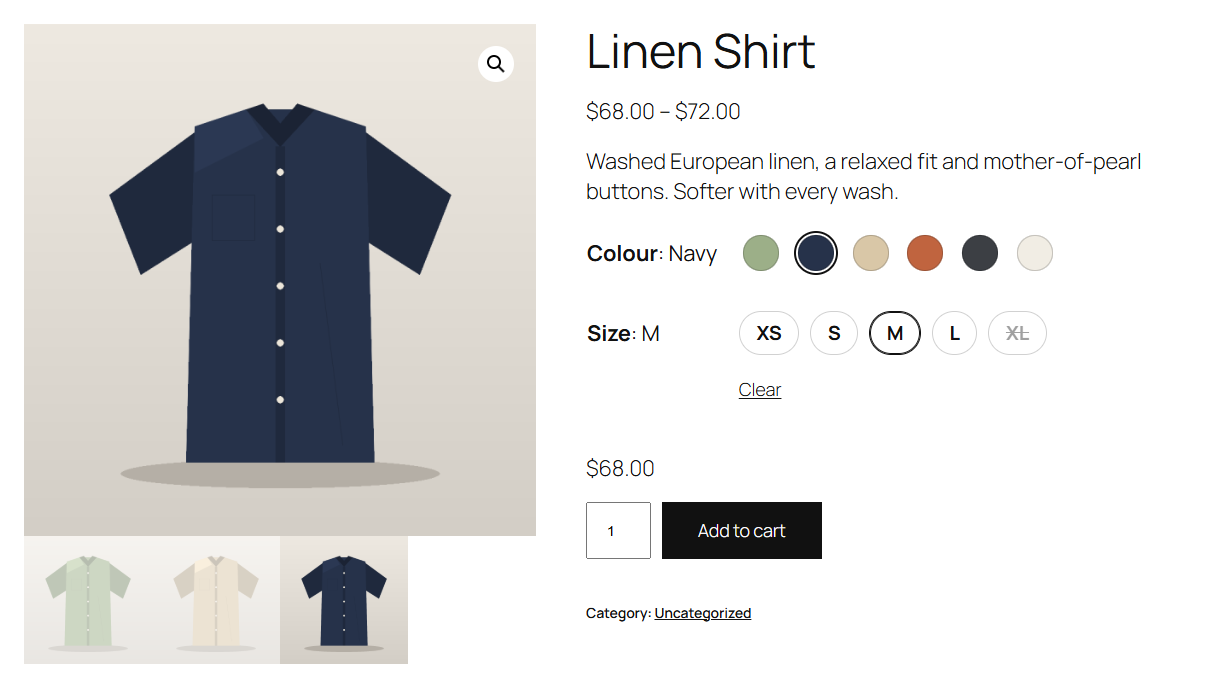
Open a variable product that uses Colour for its variations. The Colour dropdown is now a row of colour swatches.
Tip
Sizes and other values without a colour look best as Label swatches: buttons with the value's name. They need nothing but the swatch type.
What's next
- Swatch types explains Colour, Image, Label and Dropdown.
- Colours and images covers the term screens.
- The product page shows what customers see and how it works with WooCommerce.
- Settings goes through the look: shape, size, tooltips and more.