
Installation
Install Rateline from WordPress.org, add a Table rate method to a shipping zone and write your first rules.
Rateline is free and listed on WordPress.org, so you can install it straight from your dashboard.
Install the plugin
- Make sure WooCommerce is installed and active. Rateline won't activate without it.
- Go to Plugins → Add New Plugin and search for Rateline.
- Click Install Now on "Rateline – Table Rate Shipping for WooCommerce", then Activate.
If you have the zip file instead, use Plugins → Add New Plugin → Upload Plugin, choose the file, then Install Now and Activate.
Nothing changes at your checkout yet: Rateline adds a shipping method, and a method only appears once it's in a shipping zone.
Add Table rate to a zone
- Go to WooCommerce → Settings → Shipping.
- Open the zone you ship to, for example "United States", or create one with Add zone.
- Click Add shipping method, choose Table rate, and continue.
- The method appears in the zone's list. Click Edit under it.
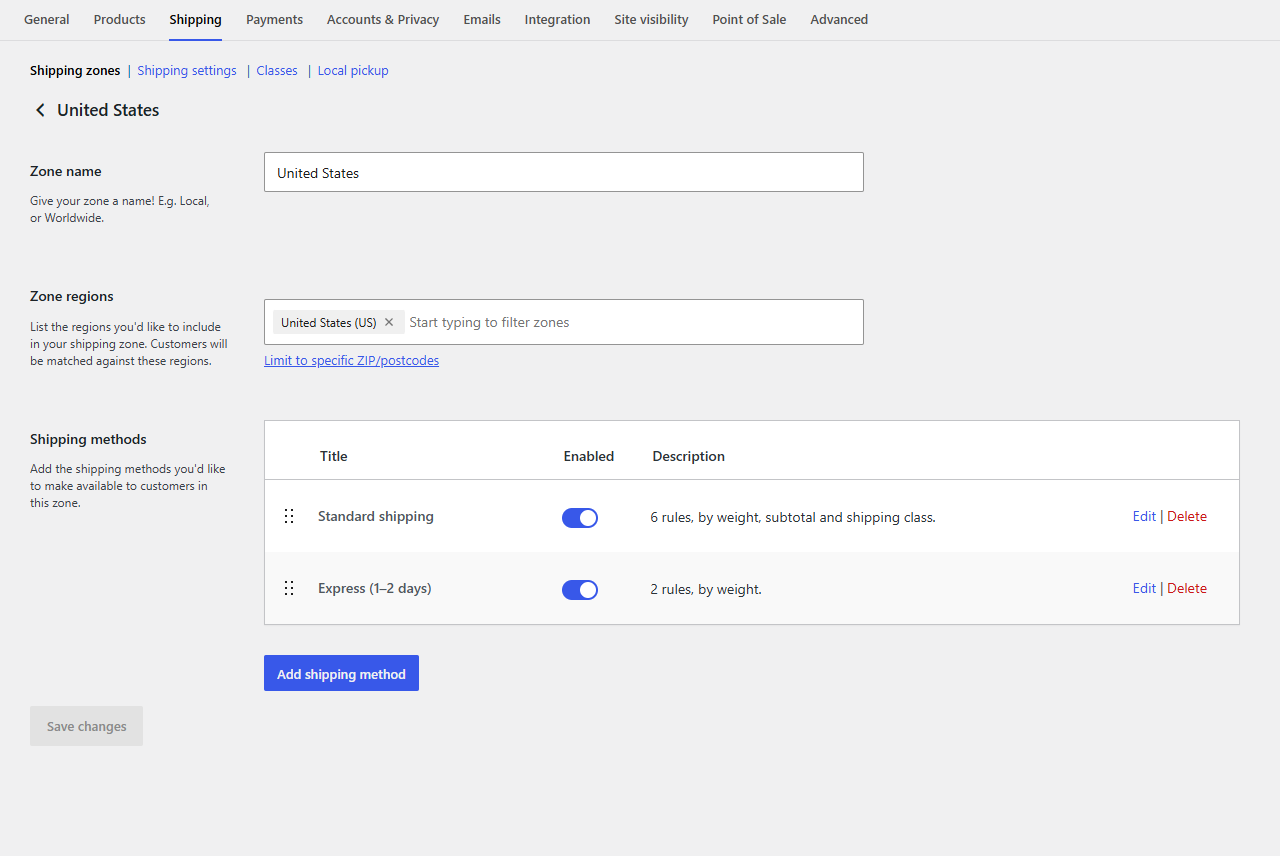
The Edit link opens a full settings page rather than WooCommerce's small dialog, because the rules table needs the room.
Write your first rules
- Give the method a Name, such as "Standard shipping". That's what customers see at checkout.
- Under Rules, click + Add rule for each price band. For example:
- When Weight from (empty) to 5: cost 6.95
- When Weight from 5 to 20: cost 9.95, per lb 0.50
- When Always: tick No shipping (nothing over 20 lbs ships)
- Click Save changes.
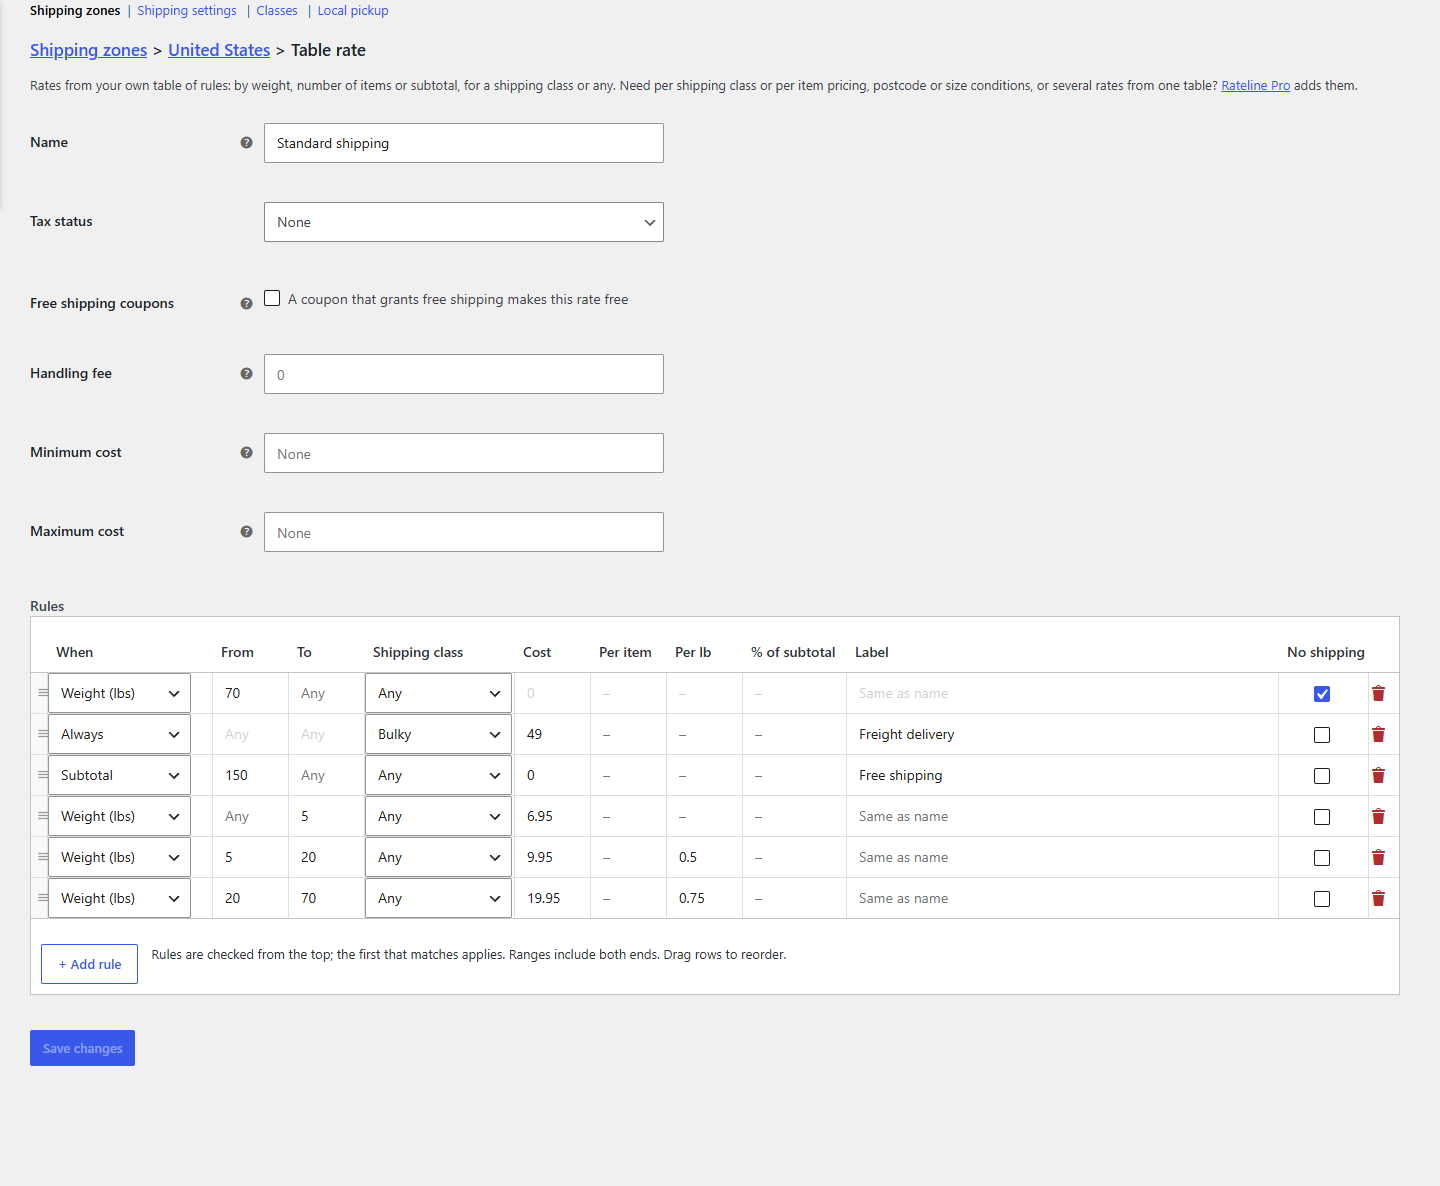
Add something to your cart and open the cart or checkout: the Table rate shows with the price from the first rule that matches.
Tip
Test with a product whose weight you know. Products without a weight count as 0, so a weight band starting at 0 (or with an empty "From") catches them.
What's next
- How table rates work explains the order of rules and what happens when none matches.
- Conditions and shipping classes and Costs cover each column of the table.
- Example tables has complete tables for common setups to copy.