
Installation
Install Stockline from WordPress.org and set your first stock messages in a few minutes.
Stockline is free and listed on WordPress.org, so you can install it straight from your dashboard.
Install the plugin
- Make sure WooCommerce is installed and active. Stockline won't activate without it.
- Go to Plugins → Add New Plugin and search for Stockline.
- Click Install Now on "Stockline – Custom Stock Messages for WooCommerce", then Activate.
If you have the zip file instead, use Plugins → Add New Plugin → Upload Plugin, choose the file, then Install Now and Activate.
Nothing changes on your store yet: until you enter a message, Stockline keeps WooCommerce's own wording and only adds the default icon and colour for each state.
Set your first messages
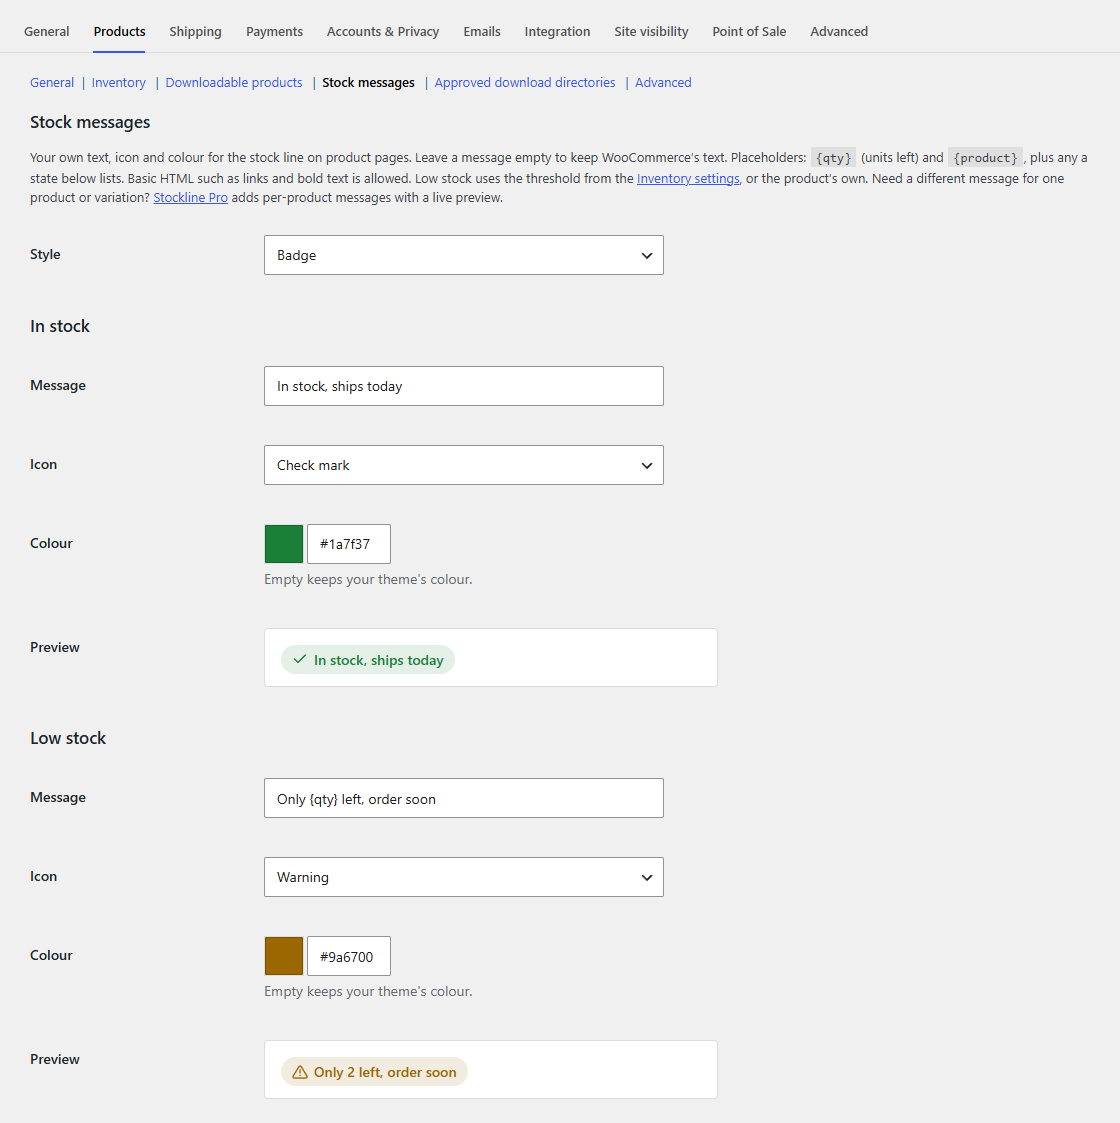
- Go to WooCommerce → Settings → Products → Stock messages. There's also a Settings link under Stockline on the Plugins screen.
- Choose a Style: plain text or badge.
- For each stock state, type a message, and pick an icon and a colour if you want something other than the defaults. The Preview under each state shows the result as you type.
- Click Save changes.
Now open a product page on your store. The stock line under the price shows your message for whatever state the product is in.
Tip
To see every state quickly, keep one test product around and change its stock quantity and Allow backorders? setting on its Inventory tab: 0 with backorders off is out of stock, 0 with backorders allowed is on backorder, a number at or below your low stock threshold is low stock.
What's next
- Store-wide messages explains when each message is shown.
- Placeholders puts the quantity left or the product name into a message.
- Icons and colours and Badge or plain style cover the look.